Story Tools

Story to Comic for Panel plans

For writers converting existing stories into visual sequences, Story to Comic is built to break prose into drawable moments with clear transitions. The page focuses on the practical need to turn loose story material into language that can survive panel space, pacing, and character voice, so the output can be judged as structured text with a clear production role.

Story to Comic workflow turning blank story cards into panel thumbnails and page preview

실무 판단

Story to Comic가 도움이 되는 상황

Story to Comic is strongest when the creator already knows the decision they need to make. Use it for panel plans, scene beats, and comic adaptation notes, then judge the result by voice, pacing, line length, scene logic, and whether the words leave room for the art to do work. That keeps the page grounded in writing and adaptation rather than broad image generation.

The honest limitation is this: copying prose directly can create panels with too many ideas at once. In practice, the result may sound fluent while ignoring panel context, bubble length, or the speaker's emotional state. Stronger results come from the first decision: decide what the reader must understand before polishing wording. The working constraint is: adapt the story by choosing the visible change in each beat.

이럴 때 사용

  • Adapting existing prose, scripts, or lesson material into comic structure.
  • Choosing which story moments become panels, captions, dialogue, or skipped context.
  • Creating panel plans, pitch boards, educational comics, and short story adaptations.

주의할 상황

  • Copying prose directly into image prompts.
  • Trying to force several invisible ideas into one panel.

Workflow

A Story to Comic workflow that protects the result

The workflow below is specific to Story to Comic: define the writing and adaptation decision, set the asset boundary, give visible evidence, then approve only the drafts that can move into a real next step.

1

Choose the beat

Start by writing the job in one sentence: break prose into drawable moments with clear transitions. For Story to Comic, the first decision is to decide what the reader must understand before polishing wording.

2

Set speaker context

Decide whether the output is meant to become short story adaptations, scripts, educational comics, and pitch boards. That choice controls crop, detail density, text space, and how much of the scene belongs in one pass.

3

Give usable evidence

Describe what the model should make visible: line breaks, speaker labels, beat order, emotional turn, and practical notes for the next visual pass. Then add the style language that matters here: beat selection, panel jobs, character focus, and visual transitions.

4

Draft line options

Generate alternatives by changing one variable at a time. For writing and adaptation, useful variables include camera distance, emotion, panel role, source fidelity, line weight, or text hierarchy.

5

Check page fit

Keep a result only when it passes the review focus: voice, pacing, line length, scene logic, and whether the words leave room for the art to do work. The next move should be obvious: move the approved text into captions, bubbles, prompts, thumbnails, or a page plan.

Prompt craft

Prompt pattern for Story to Comic

A useful Story to Comic prompt begins with the asset you need, not a list of style adjectives. Give the model a visible subject, the production role, and the review focus: voice, pacing, line length, scene logic, and whether the words leave room for the art to do work.

Reusable formula

Subject + visible change + structured text role + short story adaptations, scripts, educational comics, and pitch boards + beat selection, panel jobs, character focus, and visual transitions + review rule: adapt the story by choosing the visible change in each beat.

Weak prompt

turn my story into comic

Stronger prompt

a short story scene where a child finds a clockwork orchard behind a wall, designed for short story adaptations, scripts, educational comics, and pitch boards, with beat selection, panel jobs, character focus, and visual transitions; make the reader understand that adapt the story by choosing the visible change in each beat; leave clean space for later editing and keep the focal point clear.

Why this works

The stronger version names the subject, the visible change, and the asset role. It also tells the tool what success looks like for writing and adaptation: voice, pacing, line length, scene logic, and whether the words leave room for the art to do work.

Quality signals

How to judge Story to Comic output

Use these checks before spending more time on a result. They are tuned for Story to Comic, where the main risk is that the result may sound fluent while ignoring panel context, bubble length, or the speaker's emotional state.

Line purpose

The viewer should know what to notice first. For this tool, that first read should support adapt the story by choosing the visible change in each beat.

Bubble fit

The draft should behave like structured text with a defined job. Check whether it is actually useful for short story adaptations, scripts, educational comics, and pitch boards.

Speaker voice

Leave room for bubbles, captions, crop marks, export UI, or follow-up editing instead of filling every inch with detail.

Beat order

A repeatable result needs visible anchors: line breaks, speaker labels, beat order, emotional turn, and practical notes for the next visual pass. Save those anchors beside the generated draft.

Context loss

Look directly for the common failure: the result may sound fluent while ignoring panel context, bubble length, or the speaker's emotional state. If that appears, revise the brief before generating again.

Next visual pass

A keeper should point to a clear follow-up: move the approved text into captions, bubbles, prompts, thumbnails, or a page plan. If it does not, treat it as a mood reference, not production output.

Visual examples

References that fit Story to Comic

Story-to-comic examples should show adaptation choices: visible action, scene transition, and panel job.

Story to Comic workflow with story cards becoming comic panel thumbnails

Adaptation workflow

Story adaptation works when prose is split into visible changes, panel candidates, and supporting text.

Comic story page adaptation reference

Page candidate

A story beat becomes stronger when it can sit inside a readable page.

Story to comic visual reveal reference

Visual reveal

Abstract discovery should become a visible object, place, and reaction.

Creator field guide

How experienced creators use Story to Comic

These notes are the practical layer behind the generator. They help creators decide what to ask for, what to ignore, and when a draft is ready to move into a larger ComicsAI workflow.

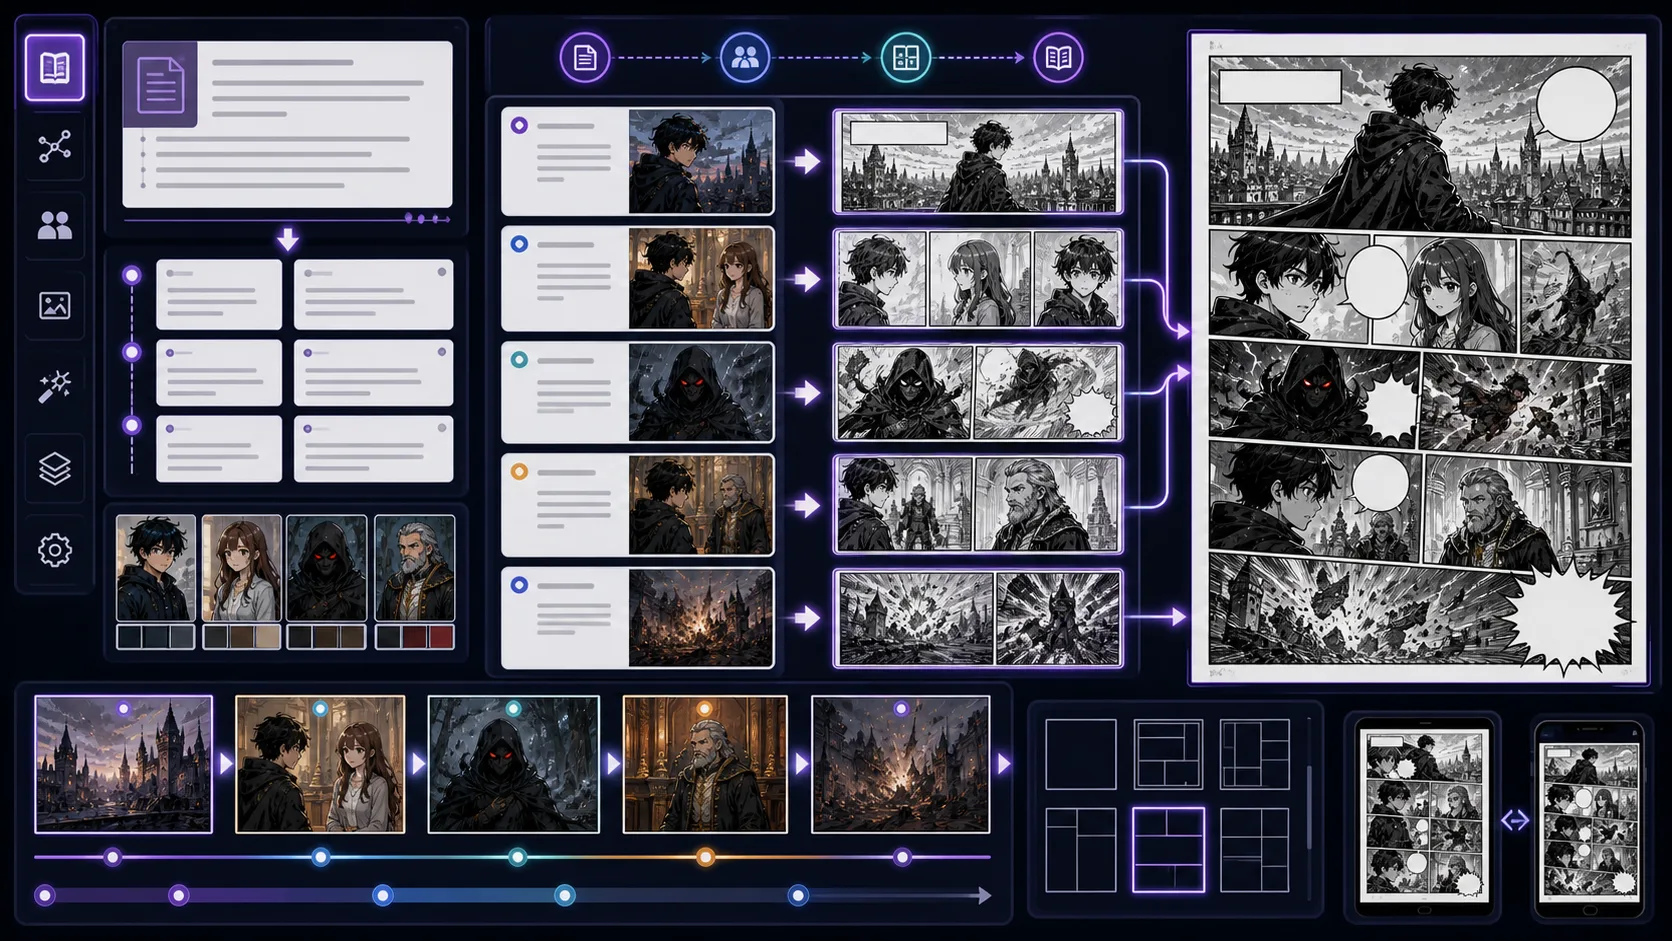
Brief Story to Comic around one deliverable

Do not ask for a whole project in one prompt. Ask for structured text that helps writers converting existing stories into visual sequences. A good brief names the deliverable, the visible subject, the emotional change, and the format. For this page, "a short story scene where a child finds a clockwork orchard behind a wall" is more useful when it is tied to short story adaptations, scripts, educational comics, and pitch boards and a concrete review rule: adapt the story by choosing the visible change in each beat.

Protect the writing and adaptation decision

Every tool here has a different creative pressure. In Story to Comic, the pressure is turn loose story material into language that can survive panel space, pacing, and character voice. That means the prompt should prioritize voice, pacing, line length, scene logic, and whether the words leave room for the art to do work before extra polish. A beautiful result is still weak if it fails the decision the page was built to make.

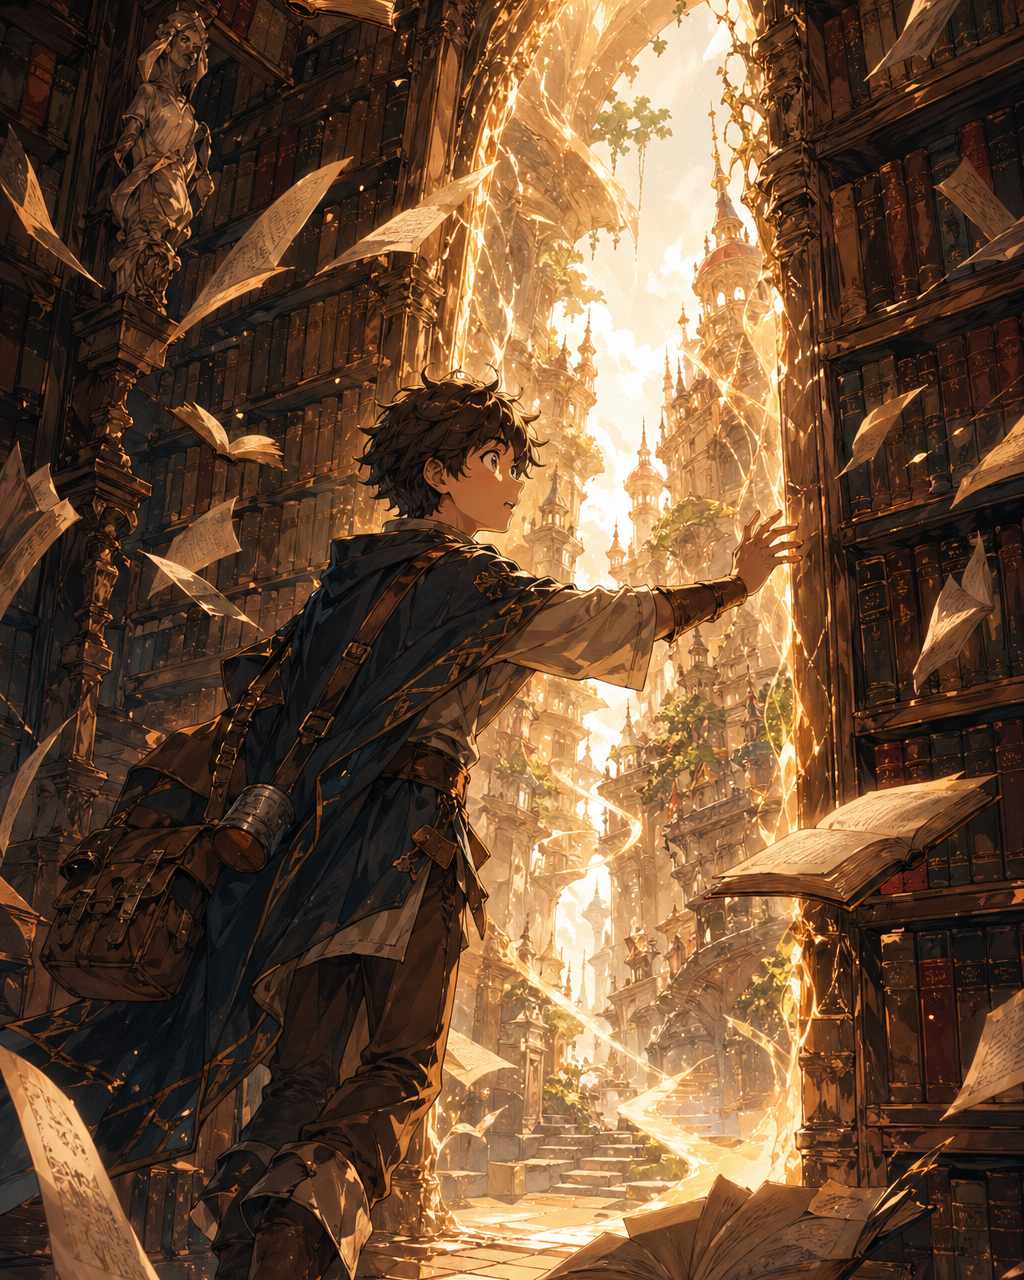
Turn invisible story into visible signals

Backstory, mood, and theme only help when they change something the reader can see. Translate hidden ideas into posture, crop, lighting, props, wording, panel height, or negative space. This protects the tool from the common failure where the result may sound fluent while ignoring panel context, bubble length, or the speaker's emotional state.

Compare versions with one test rule

Use the same test prompt when comparing styles or settings. Change only one thing at a time, then judge against adapt the story by choosing the visible change in each beat. This makes the result easier to discuss with collaborators because the debate moves from taste to observable evidence.

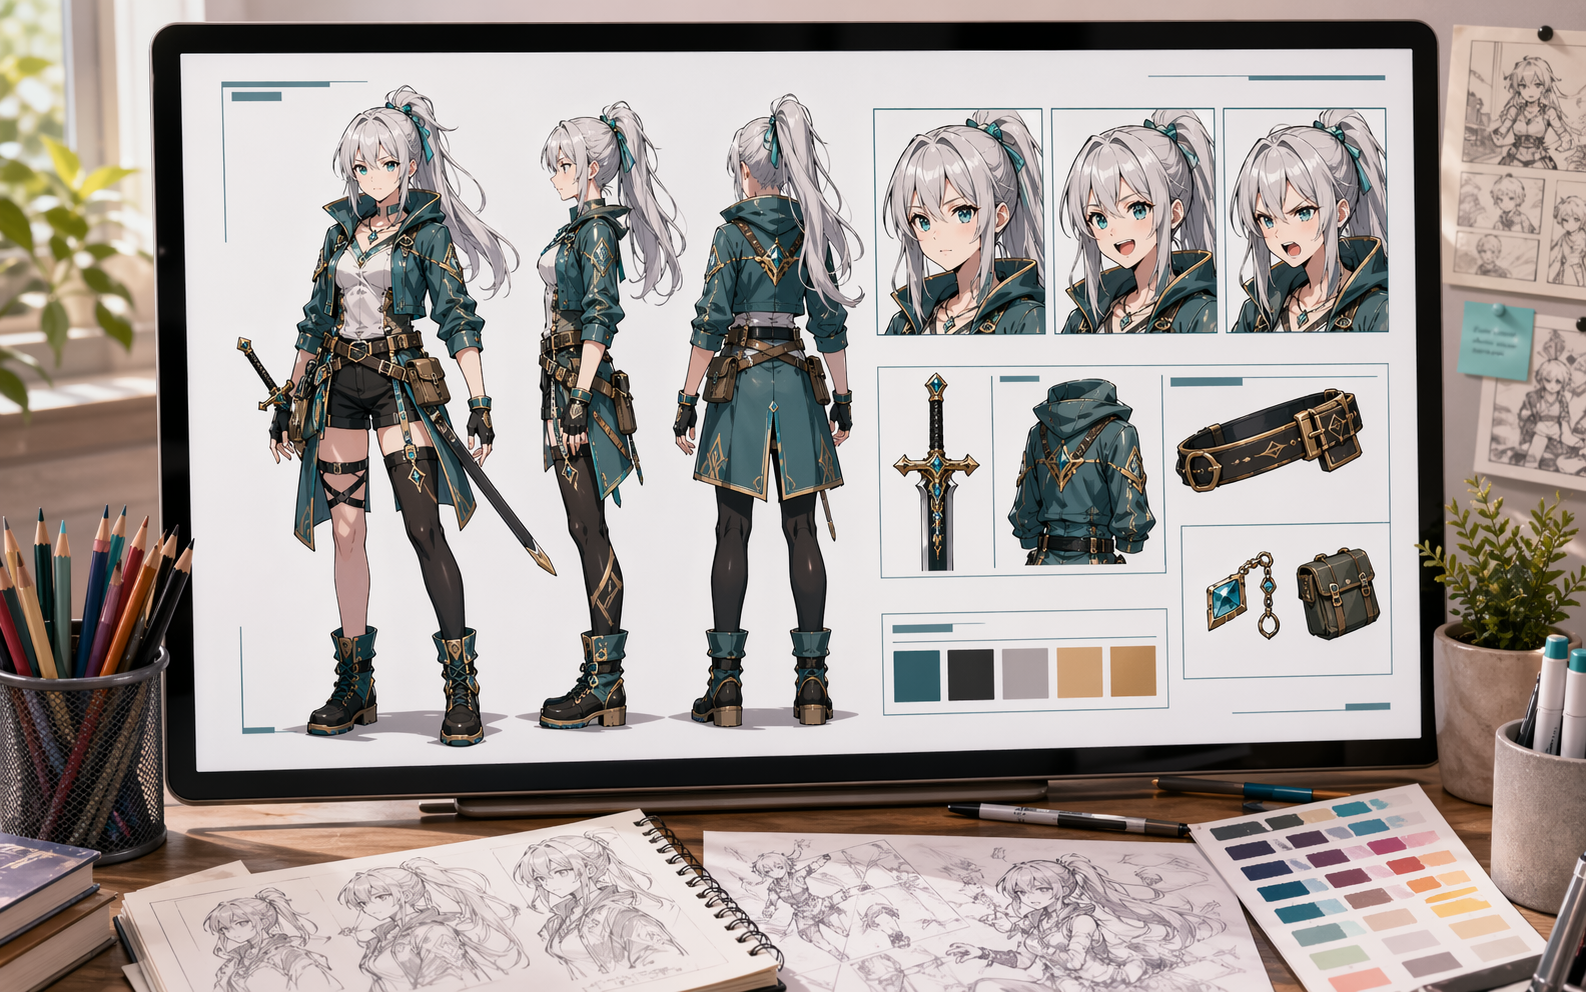
Document the useful part

When a result works, write down why. Note the prompt phrase, the crop, the style detail, and the limitation. For Story to Comic, the useful part is usually not the whole image; it may be the silhouette, the line break, the scroll timing, the character anchor, or the panel role.

Stop when the draft has a job

The goal is not endless regeneration. Stop when the output can become the next asset in the chain: move the approved text into captions, bubbles, prompts, thumbnails, or a page plan. That habit keeps the tool connected to real comic production instead of turning the page into a gallery of unrelated experiments.

Useful Story to Comic scenarios

Short story adaptation

Turn prose into panel beats without overloading each image.

Educational comic

Convert explanation into examples, scenes, captions, and visual steps.

Common Story to Comic mistakes

Too much per panel

One panel usually needs one visible change, not an entire paragraph.

No transition plan

Adaptation fails when the reader cannot move between moments smoothly.

Where to go next

After adaptation, continue with Text to Comic AI, Comic Page Generator, Storyboard Generator, prompts, or captions.

크리에이터 질문

What is Story to Comic?

Story to Comic is a ComicsAI tool for panel plans, scene beats, and comic adaptation notes. It is built around break prose into drawable moments with clear transitions, with a practical focus on turn loose story material into language that can survive panel space, pacing, and character voice.

How do I get better story to comic results?

Start with the production role, then describe visible evidence: line breaks, speaker labels, beat order, emotional turn, and practical notes for the next visual pass. Add beat selection, panel jobs, character focus, and visual transitions, and review the result for voice, pacing, line length, scene logic, and whether the words leave room for the art to do work.

What should I check before keeping a Story to Comic result?

Check whether the result supports adapt the story by choosing the visible change in each beat. Also look for the main failure mode: the result may sound fluent while ignoring panel context, bubble length, or the speaker's emotional state.

Should the prompt be long or short?

Focused is better than long. Include details only when they change structured text: crop, voice, pose, line breaks, source fidelity, panel role, or layout space.

How does this fit with the rest of ComicsAI?

Use Story to Comic for writing and adaptation, then continue with related tools such as Text to Comic AI, Comic Page Generator, Storyboard Generator when the project needs the next draft, edit, reference, or release step.