Audit the input type
A sketch, screenshot, render, and reference board need different conversion rules. Identify the source type before choosing a comic style.
Image Tools
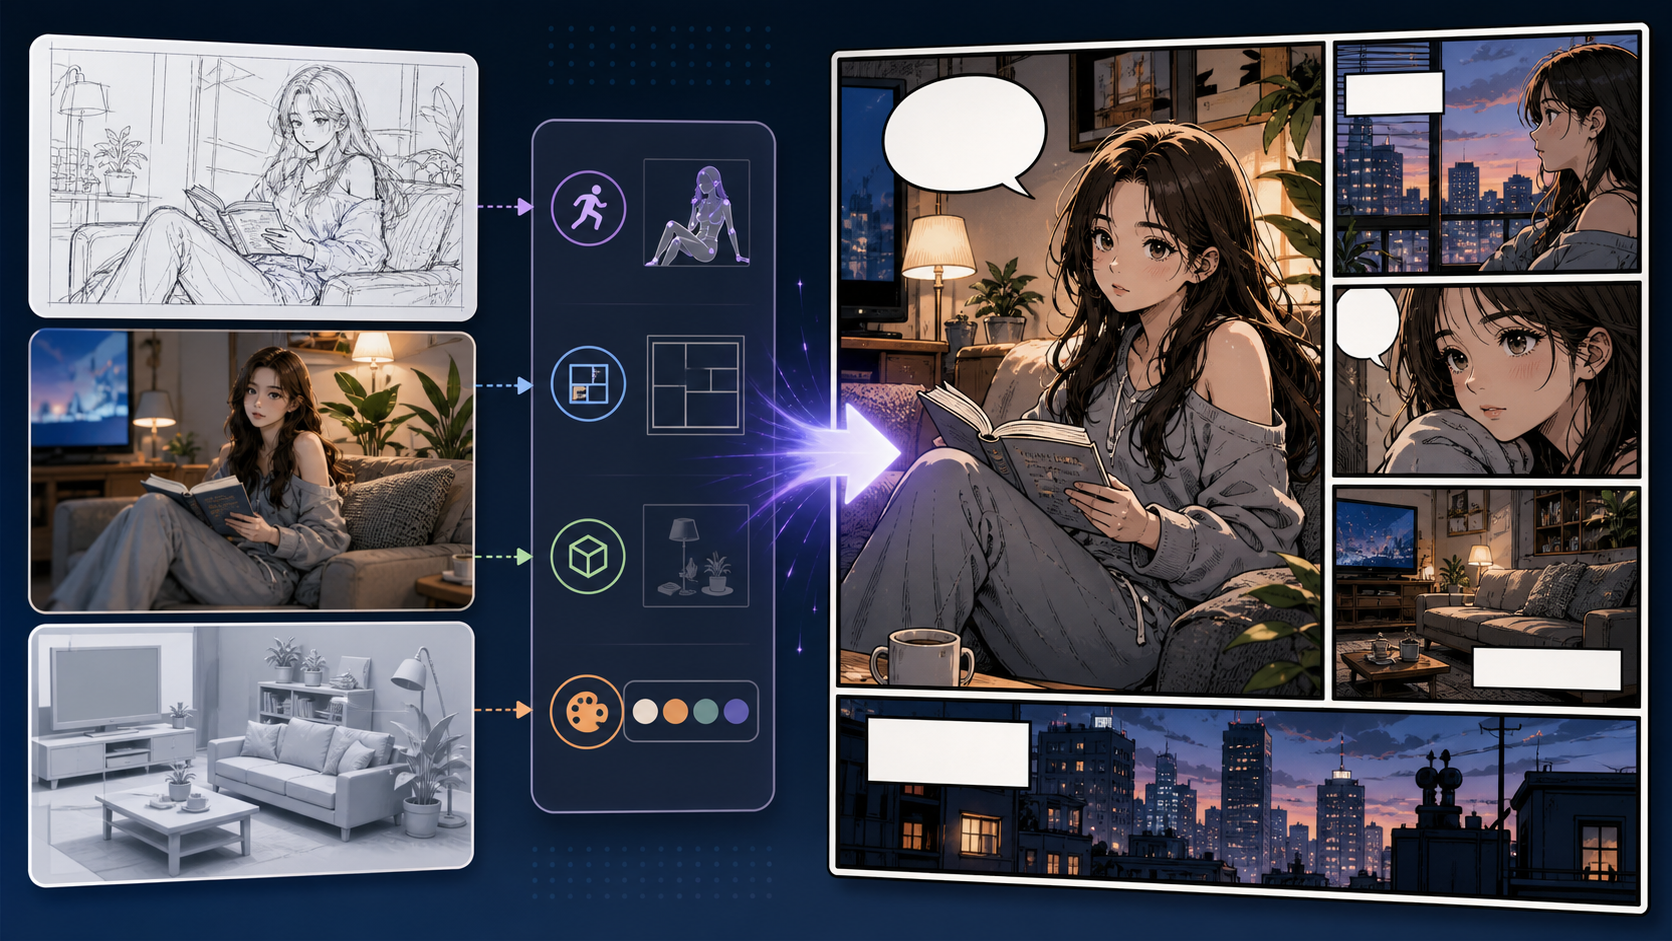
Image to Comic converts existing artwork, references, screenshots, or sketches into comic-style drafts. It is useful when the source image has structure worth keeping but needs a stronger comic look and panel purpose.
Practical take
this workflow is broader than photo conversion. The input might be a sketch, mood board, reference image, rough concept, or rendered scene. The task is to keep the useful structure and translate the image into comic storytelling language.
The risk is over-stylization. If the comic version loses the composition, object placement, or character pose that made the source useful, the conversion is not doing its job.
Workflow
Image to Comic should begin with an audit of the source image and the comic role it needs to play.
Decide what must be preserved: layout, pose, object, color mood, or scene idea.
Use the result as a panel, cover study, character reference, background, or style test.
Ask for comic ink, color, shadow, and line treatment without erasing the source structure.
Keep the conversion only if it improves readability for the intended comic use.
Prompt craft
A useful Image to Comic prompt begins with the asset you need, not a list of style adjectives. Give the model a visible subject, the production role, and the review focus: source fidelity, crop, lighting simplification, stylized edges, and whether the converted image still has a clear subject.
Subject + visible change + converted reference role + character redraws, prop studies, location references, and art direction tests + ink lines, color blocks, halftone hints, lighting simplification, and panel crop + review rule: state whether the image should become a cover, panel, background, or reference.
convert image to comic
an old bicycle image turned into a warm slice-of-life comic prop shot, designed for character redraws, prop studies, location references, and art direction tests, with ink lines, color blocks, halftone hints, lighting simplification, and panel crop; make the reader understand that state whether the image should become a cover, panel, background, or reference; leave clean space for later editing and keep the focal point clear.
The stronger version names the subject, the visible change, and the asset role. It also tells the tool what success looks like for image conversion: source fidelity, crop, lighting simplification, stylized edges, and whether the converted image still has a clear subject.
Quality signals
Good image-to-comic output should feel intentionally adapted, not blindly restyled.
The important layout or subject relationship should remain intact.
Lines, contrast, and color should guide the eye better than the original.
A background conversion, cover conversion, and character conversion need different review standards.
The result should be easy to crop, caption, or continue into another tool.
Visual examples
These examples cover different source outcomes: digital comic treatment, vintage look, and scene adaptation.
Image-to-comic work can start from sketches, references, renders, or screenshots; the key is choosing what structure must survive.
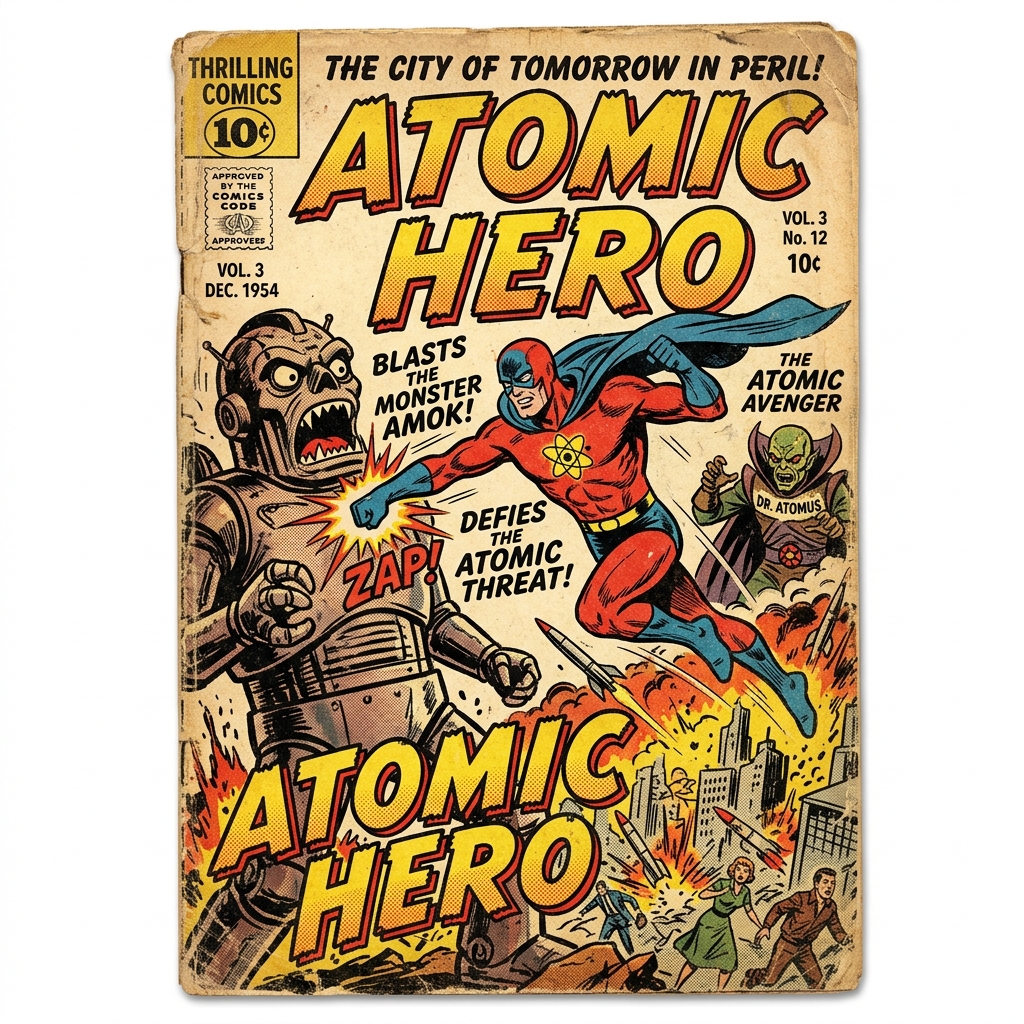
Halftone, print texture, and limited color can turn an image into a retro comic asset.
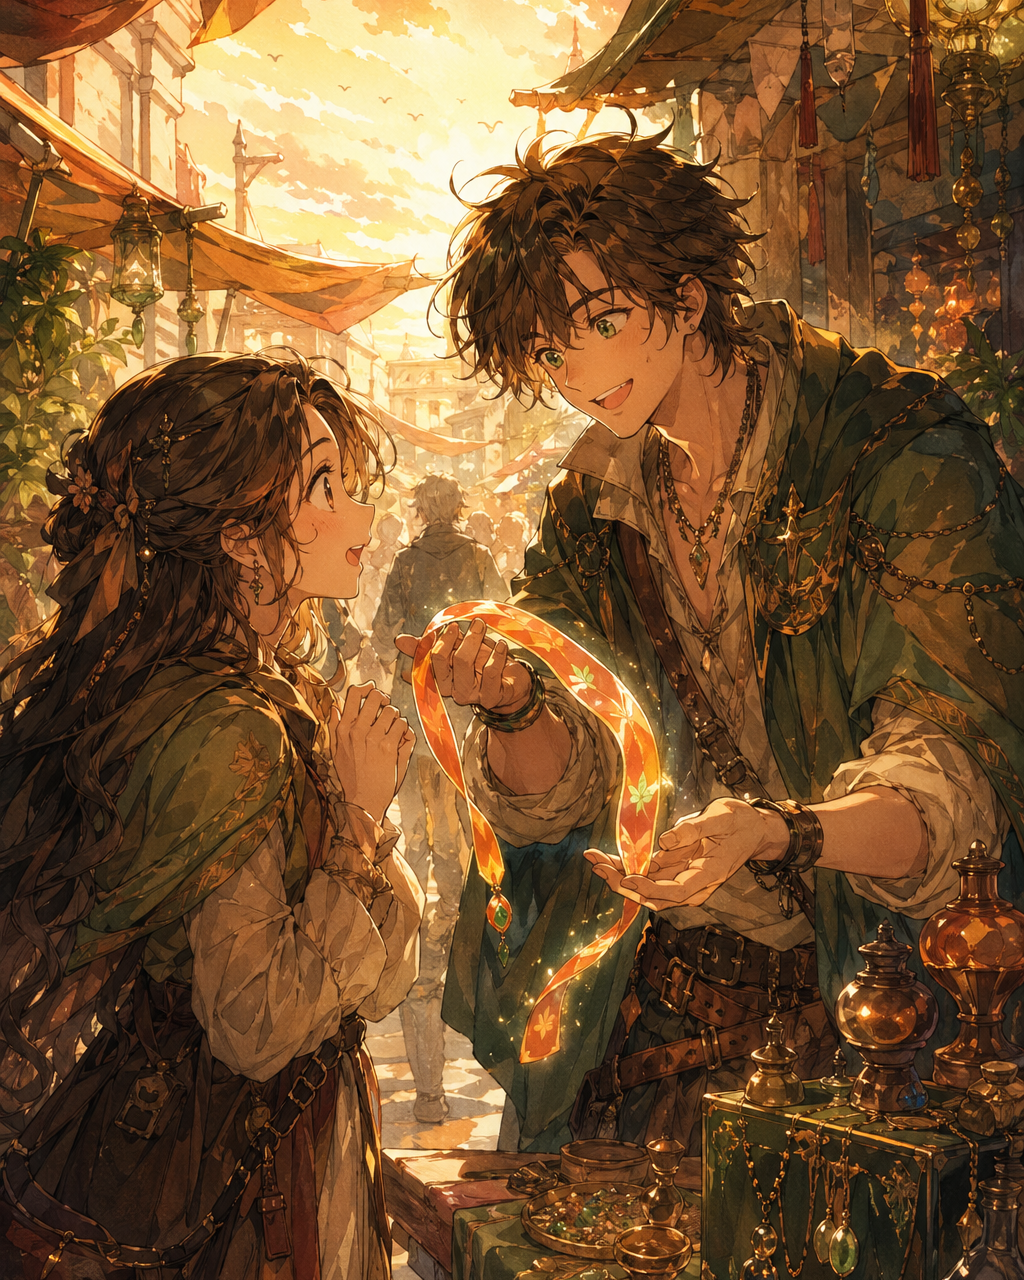
A reference scene becomes more useful when the comic version clarifies subject and mood.
Creator field guide
These notes help creators decide what to plan, what to ignore, and when a draft is ready for the next production step.
A sketch, screenshot, render, and reference board need different conversion rules. Identify the source type before choosing a comic style.
Tell the tool what cannot change: pose, layout, object placement, color mood, or character relationship.
The result can become a panel draft, cover study, background reference, or style test. Judge it by that specific use.
Field notes
Image to Comic is broader than Photo to Comic because the source may be a sketch, screenshot, 3D render, reference board, or existing artwork. That means the workflow should focus on source diagnosis. A rough sketch needs clarification, a render needs comic simplification, and a screenshot may need composition cleanup.
The most important prompt instruction is preservation. The user should decide what cannot change: pose, layout, object relationship, color mood, or character placement. Without that rule, the conversion may produce a stylish image that no longer serves the original purpose.
A strong content angle is to position the tool as a bridge. It can turn visual notes into comic drafts, rough environments into backgrounds, sketches into panel ideas, and style references into production tests. That creates a richer page than simply saying it converts images into comic style.
The output should also be judged by edit readiness. A converted image may be useful if it creates clearer edges, stronger contrast, or a better focal point, even if it is not final art. Creators can then move it into prompt generation, caption writing, cover testing, or panel layout. That layered workflow gives users a reason to stay inside the product after the first conversion.
Turn a rough visual idea into a more readable comic draft.
Adapt an existing scene into a comic environment.
Different inputs need different preservation rules.
Comic style should improve readability, not erase the source value.
After converting an image, move into photo-to-comic, captions, prompt generation, or panel layout depending on the asset role.
Photo to Comic focuses on real photos. Image to Comic can also work from sketches, reference art, screenshots, concepts, or other visual inputs.
Yes. Give guidance about which sketch elements should remain and what comic style should be applied.
The prompt may not define preservation rules. Specify the pose, layout, subject relationship, or object placement that should stay.
Yes. Use converted images as panel drafts, references, cover studies, backgrounds, or style tests.